On the Maps & Data Sources tab of the toolbar, click Extract Layers.

The Extract Data wizard opens in the information panel.
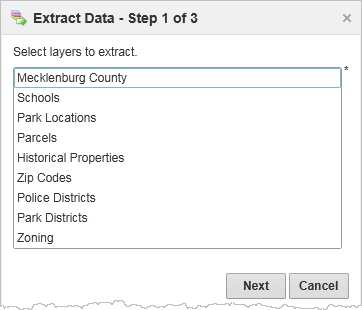
Layers listed for you to select
From the list in the box, select the layers you want to include.
Use Shift+click or Ctrl+click to select more than one layer.
Click Next.
In this step of the wizard, you select the current map area to extract the data from, or define a custom area.
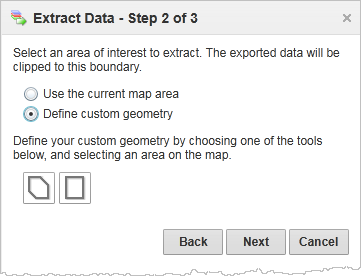
Options to select the map area
If you selected the polygon, drag across the map to start a polygon.
To change direction, click and then drag in a new direction. Shading appears to indicate that the polygon is filling in the space of the area. Double-click to end the polygon. You do not have to complete the shape, as long as the shading covers the area, you can double-click and the application completes the shape for you.
If you selected the rectangle, click the map where you want one corner of the area to begin, and then drag a rectangle to cover the area. Lift your finger off the mouse button to complete the rectangle.
When you have completed the shape, a Geometry Captured! message appears.

Shape completed during the extract process
Click Next.
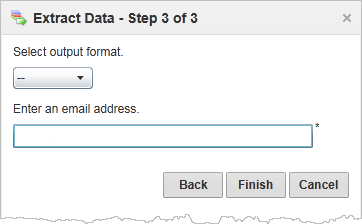
The application presents Step 3 of the wizard, where you can select the format for your data.
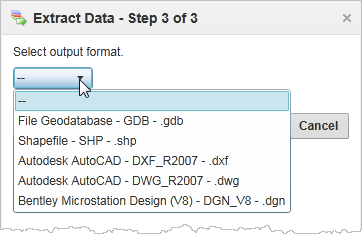
Select the format for the extracted data
Select the format and then click Finish.
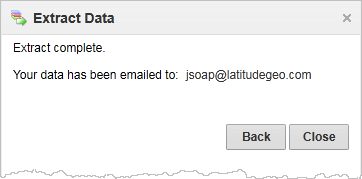
Once the data has been extracted, a confirmation message presents a link for you to download the data.
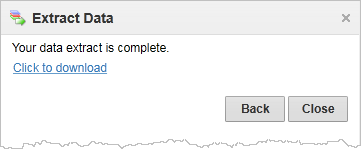
Link to download the extracted data
When you click on the Click to download link, a zip file is downloaded to your computer. You may see different dialogs depending on your Windows download settings and your browser settings.